Wednesday, December 5, 2012

The Christmas Card Gift

When I began making cards, it was strictly something I did to express some creativity and love for people I sent to. I can't possibly buy gifts for the 60 or so on my list, but I can make 60 cards and think of all the people I send to as I create. 


This year I've been blessed by people appreciating my style to the point of asking for me to create cards for them to give or send.  Mostly its been requests for one card at a time. I find this challenging because I design around the recipients as I know them, and if I don't know them its kind of tough to do that. 

A while back, I showed some friends a design idea I had to get their feedback. One really seemed to like the concept & asked that I make her some cards to send out. When her plans changed, I still had the supplies & a start to a design I could see so......I took this opportunity to take a leap of faith and create the cards for our church bazaar.


Ok, for the recipe....5x7 card base; large green cs to anchor everything

The large tan cs is textured so I was sure to run it through the embossing folder with the texture up.  Within the frame opening, I used a slightly different green cs & then the focal - a reindeer stamped in chocolate brown on a very light green dp. Around the deer I stamped some snowflakes & the swirl in bronze then used embossing powder to give it just a little glow.

Truth be told, I did the embossed pieces first having made a template so to be sure my deer would fit within it....didn't want to have any stray embossed areas on the deer from the ink still being workable.

The lower portion echos the light green dp as a matting for the tan cs. I used the same chocolate brown for the sentiment. 

The big question then was, red nose or no red nose. It came down to red nose for the church bazaar and not for the gift for my friend. Plus, on the church set, I added a sheet of acetate to wrap the front - give it a more "shelf" look.

Here they are as a single card & then the accompanying set.


Thanks for stopping by.

Wednesday, November 21, 2012

Soft Stained Glass

I found out a few days ago that my Aunt's husband passed away earlier this month.  It wasn't unexpected, but still tough on her, I'm sure. Since its been a few weeks, I decided a traditional Sympathy card wasn't quite right. 

Looking through the paper stacks & stamps for some inspiration, I came across a book of Stained Glass Vellum papers from Hot off The Press...so now is the time to try something new. 

The papers come with a border of  stained glass look. Some are strips of a continuous image, some are divided into panes.

I chose to trim out the pane cutting carefully around the portion of the image that lays over the border.  Wanting to highlight the look, I matted it on a piece of water color paper, nice white & very subtle texture.
Next, had to pick the background papers, liked the look  of the shiny teal but it was just slightly too small for the card from on its own & then it looked to plain, even backed with the dark beige. Turning to the Cuttlebug, ran it through with an embossing folder that echoed a paned look, like stained glass....

Finishing it off with a simple sentiment stamped on the dark beige & then matted in a darker turquoise cs.  I hope it brings my Aunt some comfort...
  

Sunday, October 28, 2012

Halloween Treats

So, let me first say that my son took the pictures with his iPod. I realized too late I hadn't taken any pictures....and no pictures after this much work, is just not okay - lol!

The pre-teens & teens in our church had organized a party / haunted maze. sounded like a neat opportunity to try out some treat packages....Didn't come out as I'd envisioned, but the kids enjoyed them.

The topper: black CS edged with a the Martha Stewart spider web around the page punch - only on the front edge & corners...then, a scalloped punch of white cs with a simple stamp of each - spider & boo!

The trickiest part....getting the bag to stay in the cupcake wrapper. For that, I put the wrapper in a cupcake pan, ran the double stick tape in a couple of places, then stuck the bag down - put in some candy corn, one mini Hershey, stapled & stuck on the topper.

42 done! Happy Halloween.....


Busy Months

The start of the School year always brings with it a ton of activities & never enough time.  It is also a busy time for family birthdays. Committed to not buying anymore cards given all the supplies in the house, some cards make it on time, some not quite.  Here is a brief overview of some of the cards.....


For a brother who is an avid bike rider...turning 50....The bike is a digi print from Rhoda Design Studio; Bike Stamps. I had picked up some vinyl rub ons a while back, first time I used it, but think it works well here.

 
Always interested in exploring options for folds, I took this to a Z-fold. Not too complicated, but a bit of special for 50.


Next, my mother in law's birthday....for this, I wanted something a bit whimsical & fun, but soft....

I used some designer papers, the entire image is one stamp, used some embossing for a subtle sparkle...no, you can't see it in either of the photos. The outline is a CB embossing folder. For a different twist, I ran the ribbon on an angle.
 
 
 Next up.....two nephews. Actually, one got his very late....unfortunately, not that out of the ordinary. But, the second one had his on time - YEAH!

Enough of that, now to the cards...

Wanted to try this effect, different dp with opposite rounded corners. Very simple, but a neat look. Topped off with a plain greeting & stamped cake piece, colored with pencil. Perfect for a 20 yr old. (should start now to think what I'm going to do for him next year - the big 21)


For his younger brother, he's kind of into guitars, and turned 14 so he needed a TEEN card. Searched for an appropriate digi & found it - a Stampin' Up brush stamp - Extreme Guitar. Printed up a computer greeting, turned the black matt on an angle & its that simple. Oh, the digi comes black, I washed it out for the grey look. 

The very first fun punch I ever purchased (12 yrs ago, mind you) was this music note. I first used it as part of a cake decoration for my then 3 yr old. Best of all, I just received an email from this nephew, he thought the card was "pretty cool" - I'd call that success with a 14 yr old - lol!

Next up, Halloween treat bags for a church party.....

Wednesday, September 26, 2012

For a Special Lady

My mother asked me to make a card for a special woman who is retiring from working with the preschool at their church. I had a blank slate, except I do have this thing for butterflies. It feels to me as though they symbolize growth. 

This is a woman who had volunteered for many years & had undoubtedly helped many children fly in one way or another. 

So, after sifting through the pads of designer paper, I came to rest on this soft violet tone. Used a coordinating DP off set on the front of the card rather than a traditional all around border. 

For the sentiment, I used the Layered Labels template by Hot Off The Press. I haven't used them much so I just realized on this "label" that once you trace one time around, if you flip it over & trace again, you get a complete outline to follow - much neater that way then guessing where the line goes to connect.   Anyway, I stamped before I cut to be sure I chose the right label. After cutting, I realized I had a smudge from the ink - what to do? Shade all the edges of course. I tested out the idea of ink on a makeup sponge - too much. Ended up going back to pastel chalk - that has to be one of the best tools I've ever bought; its lasted so many years already & you'd think I bought it yesterday. I used the makeup wedges with the chalk & smudged the edges - no more "mistake".

I layered a rectangle behind it with rounded corners and popped the sentiment up. 

okay, now the butterfly.....

I used the same designer paper, punched with a MS butterfly punch - twice. I needed 2 butterflies so they'd add dimension to each other. The two are stuck together at the body in the center. I used glitter & embossing powder both to get a bit of shine & shimmer on the wings. The body I just touched up with a bit of white gel pen. The antenna were a bit tougher...after looking at several options, the charcoal grey watercolor pencil was perfect. 

Hoping it shares the attitude of gratitude with its recipient.

Tuesday, September 25, 2012

Popup Frame

So I wanted to do something a bit special for my niece's birthday card. Saw a frame popup on Pinterest & had to try it. You start with a 4x4 in square, and its very simple to fold in & then back out.....the tutorial is on another's blog here


Funny thing, thought I had more double sided paper than I do. Since the blue was seeming a bit plain on the tips flipped out, I stamped a butterfly on one & some swirls on the others. I like that they are soft, just a little something there.

The bottom treatment is from a MS punch I picked up at TJMaxx (love the prices of paper crafting things there). Ran a ribbon through it & taped on the left over of the paper used above.  Actually, the punched strip is the blue side facing of the same paper.


I hope she likes it. 

TFL

Tuesday, August 14, 2012

Tone on Tone, Almost


I have been drawn to so many tone on tone cards lately. They make beautiful wedding cards, anniversary, etc. Love the subtle look so I tried....


 Starting with an ivory card base, layered on the subtle heather green cardstock. Next, took a piece of watercolor paper, ran it through the Cuddle Bug with an embossing folder. Using the same paper, I stamped the bird/branch image in a slate grey. Colored with watercolor pencils & added just a smidge of water to blend.
 

Stamped on the sentiment, rounded the corners then punched the ribbon slots. The sentiment & focus panel are both popped up.

Special Inspiration

 A very special man passed away, sending me to create something that would embody his spirit and be appreciated  by his wife.

He had spent a lot of time researching the family heritage, genealogy, etc. Reaching out to family across the world, making connections that hopefully will live on for generations.


For the card, I chose a couple of designer papers, backed them with coordinated card stock. Then, rather than running the ribbon above the panels, I ran it underneath where the two meet. (see inset). Lastly, a added the sentiment but it seemed a bit stark in just white. I took a paper towel pounced in the same ink & dabbed it around; rounded only 2 corners & layered it on.


"Sweet" Sixteen

 What to make when you have a special girl turning 16, but she's more of a tom-boy? A softball inspired card with just a hint of pink.
This dp came in a stack with lots of beachy / tropical pages.

I used a "chunky" stamp for the baseball/softball. Inked in white chalk ink on a dark tan cs, then added a second circle behind.

To give the sentiment a bit of a kick, I paper pierced above & below. Finally added a grommet in each corner to add to the edginess.


Wednesday, July 11, 2012

Mom's Birthday


I try to do something different & special for my Mom's cards. She appreciates them & is a very forgiving critic - lol! 
For this card, I started with the 7x10 card stock (cut down from 12x12). I was inspired by the floral design paper, but wanted a special texture so I ran it through the Cuddlebug embossing folder. 
Instead of layering up from the card front, I cut a window with my paper trimmer; leaving a 3/8 in. boarder and enough for the bottom sentiment. 
Since the other side of the paper wasn't in keeping with the look of the card, I covered that by adhering the dp to another piece of the same stock used for the card itself. Then, I used dimensional adhesives to attach the dp from the inside.

The flower is made using Fiskar Ultra ShapeXpress & 2 different templates - I love that I am doing the cutting, even if its with a template (fancy name for a stencil).  I sandwiched two identical with the different layer between. Then topped with a 2 inch scallop circle punch, a smaller scallop circle & a snowflake. Finally, finished with the pink pearl embellishment.


The bird was a bit tricky, didn't want it to take over, so had to be careful on ink color, etc. I ended up stamping & then adding some glitter to soften the look, a bit of fussy cutting, popped it up & it was good to go.


Last but not least, the sentiment...

I found a nice font on MS Word, so I printed on plain white cs. Trimmed and framed, but it needed something.....didn't really want to use a ribbon, so I took my MS border punch, punched a strip, trimmed it off straight about 1/8-1/4 inch on the opposite side. Then very carefully (took a couple of tries) I re punched from the straight side to get the effect. Added a couple of flowers made from excess punch cuts to finish it off.

Thanks for looking.

Tuesday, July 10, 2012

A Day in the Garden


So when I was growing up, I couldn't stand going into the garden to pick peas, beans, etc. I inevitably stumbled across very large spiders and didn't understand why I had to be the one doing this. 

Well, now I'm grown & really enjoy fresh produce from our backyard.  Still not crazy about working in the garden, but hey I have kids now!

I figured it was time to thank Dad for giving me an appreciation for home grown goodness and the efforts that go into each piece of produce.

For his birthday, I found a wonderful Free digital print "Girl in the Garden" from http://lineartdigitalstamps.com that I couldn't pass up. Life was too busy around Father's Day, so this had to be a special card.

As it so happens, there's also a challenge on Stampin Sisters in Christ to follow a plan....with a circle or oval element - here we go, time to get making the card.  Unfortunately, I didn't use any embellishments, so I won't be entering the challenge...oh well, maybe next time. I don't think it needs anything else.

Now to the card:


I colored the image using my watercolor pencils then cut around the thick black line. How to hide the imperfect cutting? Black background!


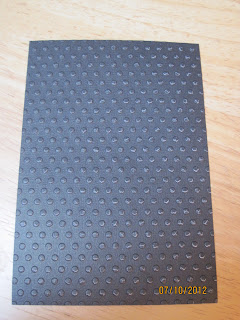
I used a Swiss dot Cuddlebug embossing folder on some inexpensive black card stock. Turns out, the pressure is too much for the stock and the white core came through. 


Now what? I've heard about inking the sides of stamps when you don't want the white layer to show, so I figured inking over this would be very similar. Some paper towel, black ink & a few circle movements later....voila, fixed!


 I left some undone on this piece, the right side is inked, the left not...doesn't come through much on the picture, but it makes a big difference!


So the gingham DP cried out farmer, but the black keeps it more stately...gentlemanly farmer, if you will.

 
Printed the Happy Birthday from the computer & layered it on. It seemed a bit stark being plain white, so I took my chalk pastels & did a faint cross hatch to mimic the gingham DP.

Thanks for looking!


Tuesday, July 3, 2012

Scuba Diver - June 2012

For this card, I needed to incorporate Scuba somehow...not an easy task with the stamps, clipart & digis out there. I finally found a digital stamp at www.digidarladesigns.com. I colored it using water color pencils to match my son's tastes. 

The designer paper in the background is a sky scene from DCWV Endless Summer stack. The card itself is DCWV Robin #1. 

I added the shells stamp from Inkadinkadoo's Coastal/marine set. Using a copper and a black ink at the same time, masked and turned it to give a varied sea floor.

The diver is colored, fussy cut, and popped up with dimensionals as well as the fish (stamped from Fiskars Flip n' flop set) 

I couldn't find seaweed I liked, so I cut my own from My Big Ideas Sunshine paper pad.

Finally, I added a variety of gold and tan colored glitter to the bottom along with the air bubbles being dots of glue with a blue green glitter mixture. 

Just goes to show, if what you want isn't out there, you can make it!